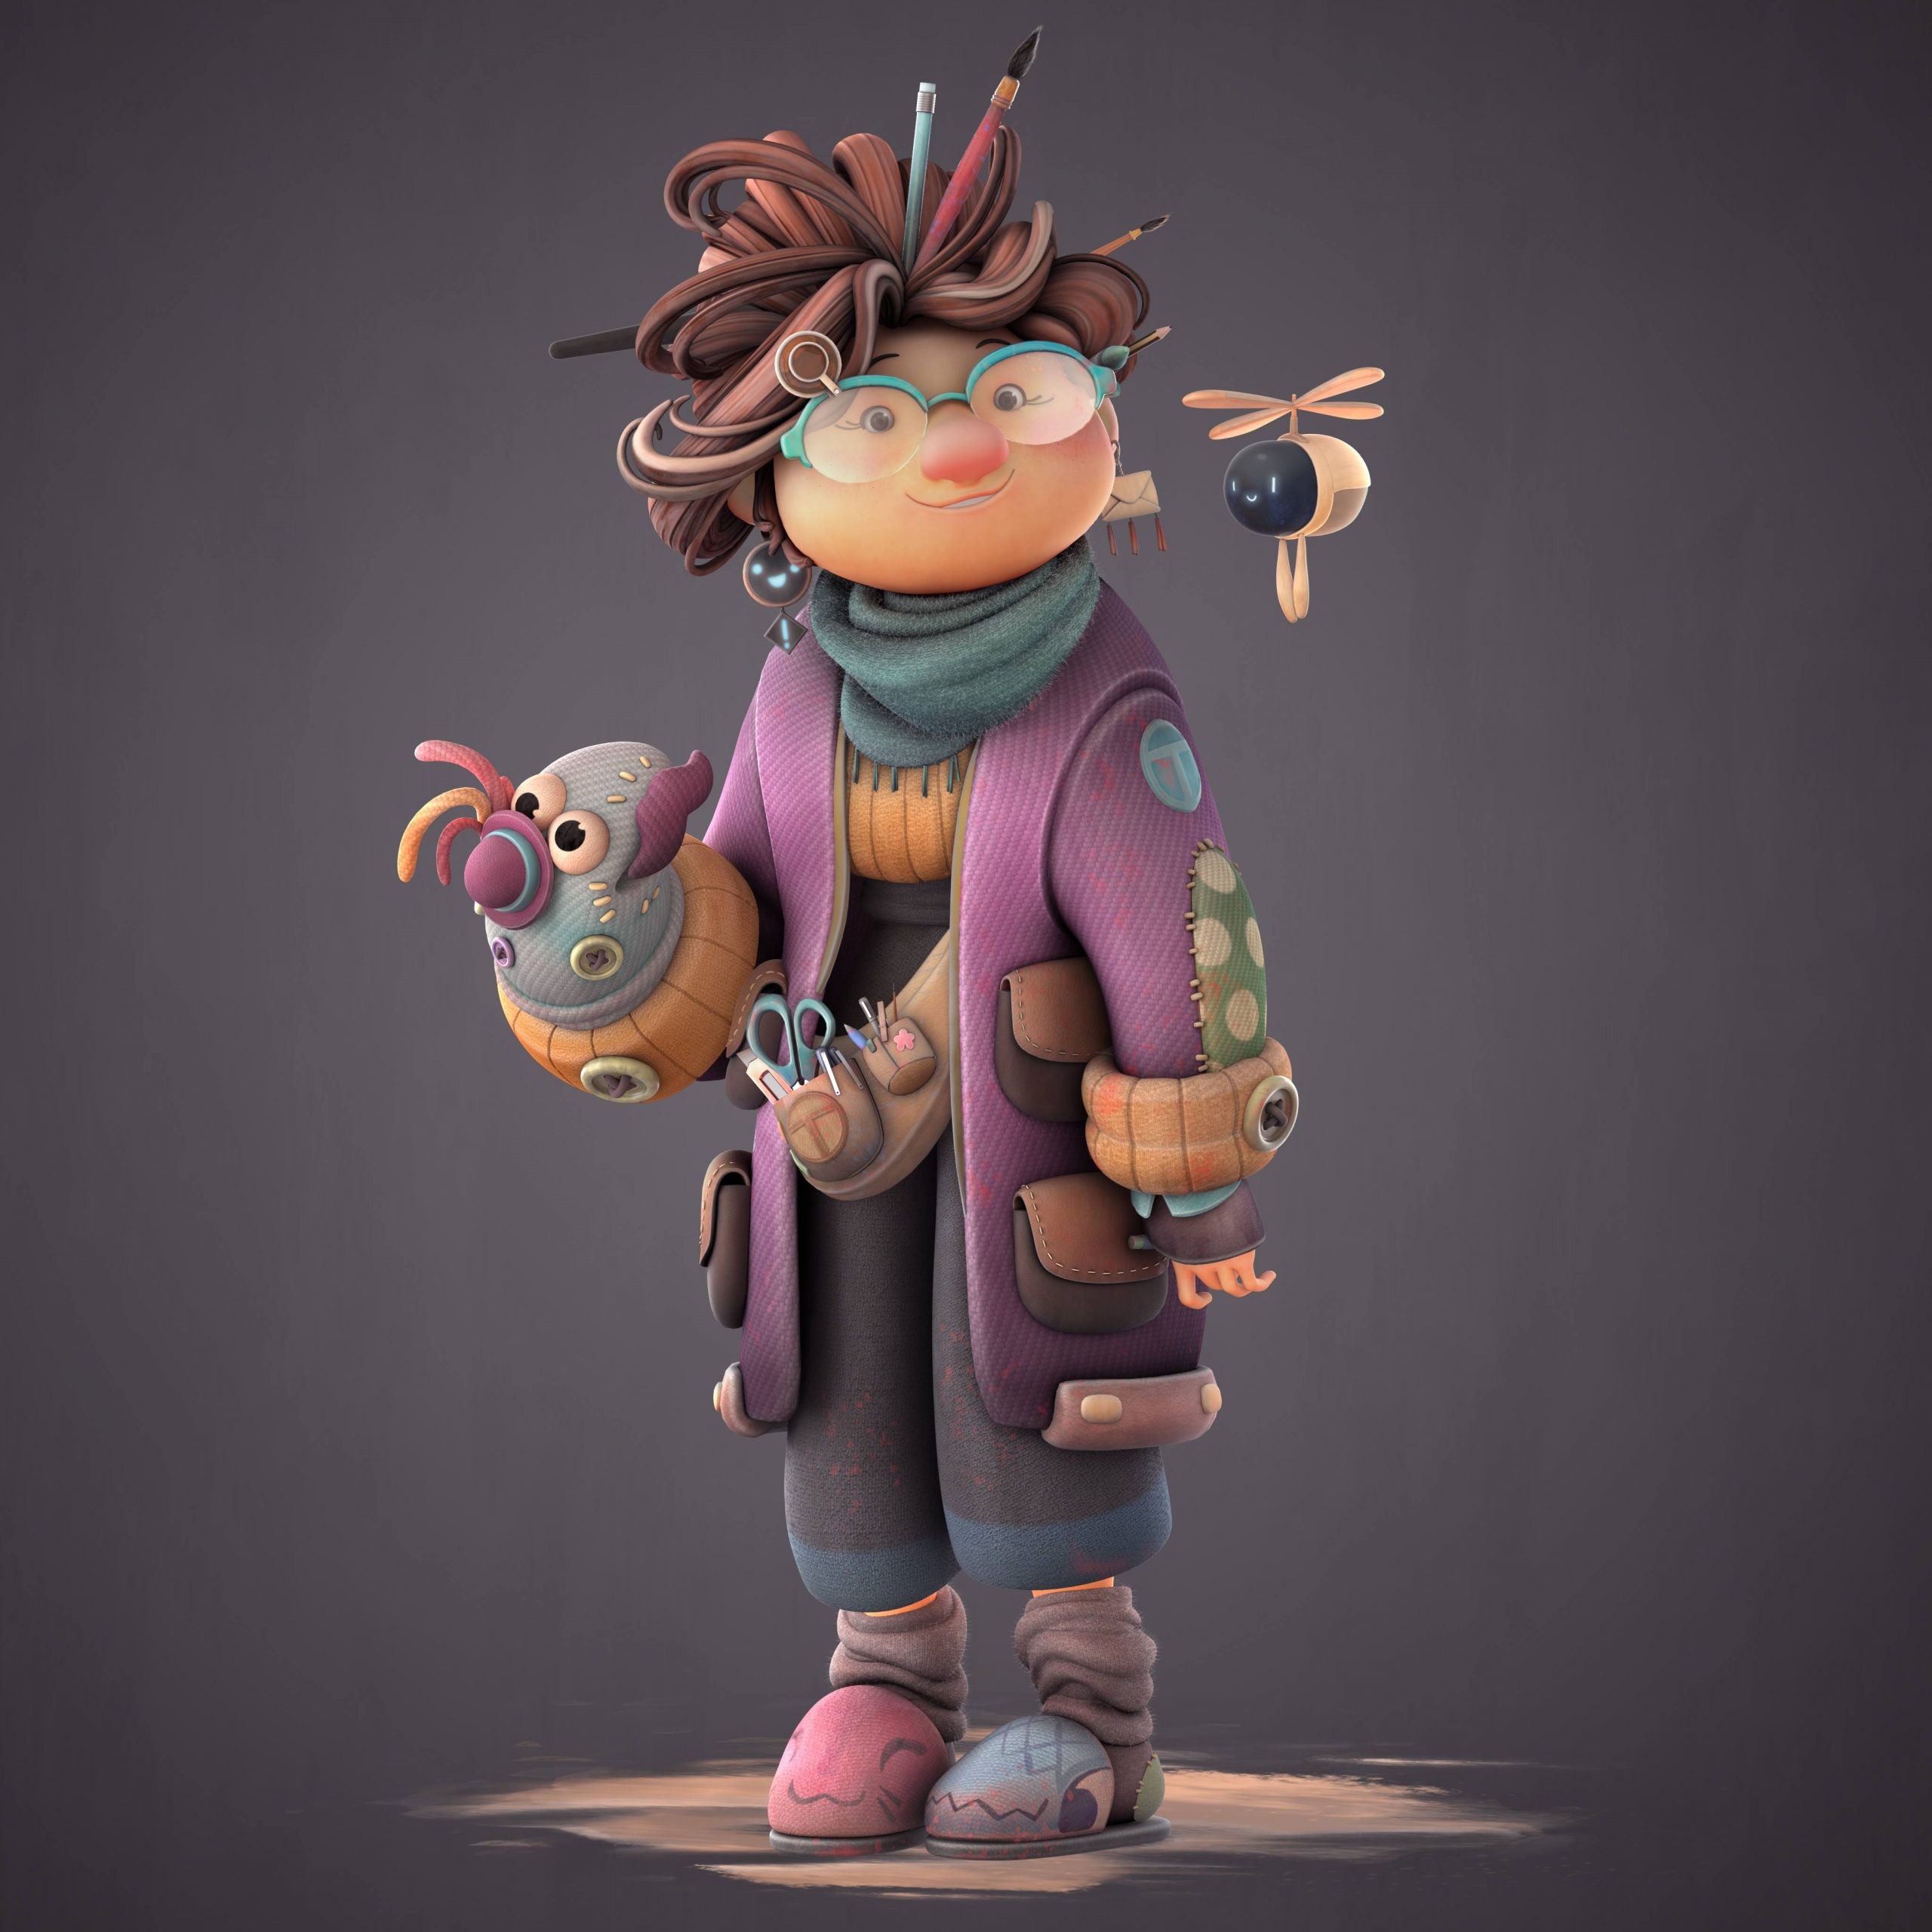
Marta Viaplana’s 3D character project for Animation, ‘Mary’, is on the cover of the latest issue of Renderout, the digital magazine of reference in the 3D animation and VFX sector. A cartoon character with semi-realistic textures inspired by Nicholas Kole’s character design. We have talked to our student to know all the details of the creation process of this wonderful character.
How did you find the reference to make Mary’s character?
I usually use different platforms such as Pinterest, Artstation and Instagram for references. I spend hours exploring to find what motivates me enough to start working. At the same time, social media allows you to follow the work of various artists. It’s where I discovered Nicholas Kole, the author of the concept for Mary’s character.
What did you like about Nicholas Kole’s work?
I’m amazed by all his designs and the way he conveys the personality of each of his characters. In addition, he achieves a sensitivity in the lines and the use of colours that I find magical.
Of all her characters, why Mary?
The reason I chose Mary was that she had a lot of props, a detail that I personally like and that motivates me. At the same time, I could easily imagine her in 3D and with realistic textures.
How do you start the process of creating a project like this?
Before starting with the sculpting, it is very important to have a good moodboard to feel comfortable and accompanied. Personally, I like to divide the elements of the character into different categories. This way, I have references for everything, be it props, clothes, hairstyles, etc. To do all this process I use the PureRef software, which allows you to put it in ‘Always On Top Mode’ to see the reference images while you continue modelling (if you only have one monitor). And it has a lot of Shortcuts that are really useful.
The first steps in 3D modelling are blocking and sculpting, how did you approach them in Mary?
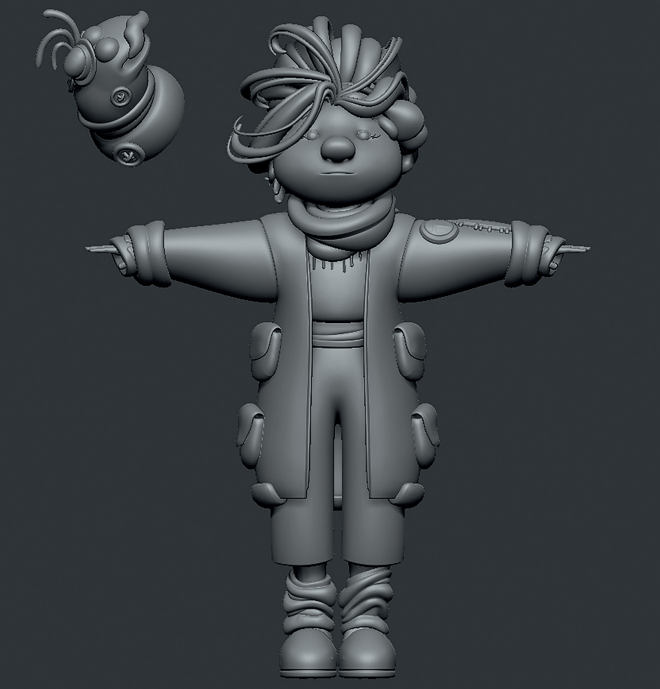
I started by sculpting the character in a T pose and with a neutral expression, which is the way it would be done in a character case for animation. I started with blocking; geometry with very little polygon density so that it was easy to start shaping the different parts of the body: arms, legs, hands… When I had the blocking ready I applied a Dynamesh with all the pieces that make up the body. And then a ZRemesher to have a cleaner topology on which to start subdividing. From there, I continued with the sculpting. And, as the body took shape, I subdivided the mesh base to get a better resolution. And, in this way, I could give a better detail to the sculpting.

Did you do retopology for Mary’s creation?
Yes, in Maya I made a topology for animation based on quads, without any tris or endgone. An optimised, clean and light topology. To make it I used the Autodesk Maya Quad Draw tool, very simple and easy to use, which I’m personally quite familiar with.
How was the process of making UV’s?
To make some Uv’s I used Maya, where I cut all the meshes in areas that were not very visible, as hidden as possible. For the layout, I divided the character into three UDIMS. The first one for the whole body, hair and eyes. The second one for the clothes. And the third one for the tools. This way, the whole figure got a good resolution.
Mary’ has a very tender body position, that’s why we asked ourselves: what program did you use to pose her?
I posed the character with Autodesk Maya’s auto rigg and, with the help of ZBrush, I corrected by hand all the vertices that were out of place. I also posed all the clothes by hand. This process was much easier, as I only needed to rotate, move, scale and fit again. This is also when I added and put in place all of Mary’s props.
How was the lighting process on Mary?
I did the lightning at the same time as I was making the materials, as I wanted to see them well in the render so I could work on them. I used a basic set of lights with a Fill Light, a Rim Light and a HDRI. Taking into account that the Subsurface simulates the effect of light entering inside the object or model I wanted to highlight the face through the lighting, so that the Subsurface material would work better.
Finally, I incorporated final details such as the mini flying robot and the contact area with the ground to make the rendering more complete. This has been the whole process of Mary’s creation, I hope you liked it!

